Thursday, June 13, 2013

Making the Cut: What parameters does Mesh Studio work with for Prims

Mesh Studio works with all prims.  As far as cuts and torture, those supported by LSL (Second Life's scripting language) are what MS will handle as well.

Please note that Linden Labs recently added "SLICE", as a parameter they support, on BOX, CYLINDER and PRISM.

PRIM_TYPE_BOX 0
[ integer hole_shape, vector cut, float hollow, vector twist, vector top_size, vector top_shear ]

PRIM_TYPE_CYLINDER 1
[ integer hole_shape, vector cut, float hollow, vector twist, vector top_size, vector top_shear ]

PRIM_TYPE_PRISM 2
[ integer hole_shape, vector cut, float hollow, vector twist, vector top_size, vector top_shear ]

PRIM_TYPE_SPHERE 3
[ integer hole_shape, vector cut, float hollow, vector twist, vector dimple]

PRIM_TYPE_TORUS 4
[ integer hole_shape, vector cut, float hollow, vector twist, vector hole_size, vector top_shear, vector advanced_cut, vector taper, float revolutions, float radius_offset, float skew ]

PRIM_TYPE_TUBE 5
[ integer hole_shape, vector cut, float hollow, vector twist, vector hole_size, vector top_shear, vector advanced_cut, vector taper, float revolutions, float radius_offset, float skew ]

PRIM_TYPE_RING 6
[ integer hole_shape, vector cut, float hollow, vector twist, vector hole_size, vector top_shear, vector advanced_cut, vector taper, float revolutions, float radius_offset, float skew ]

Sunday, April 28, 2013

Download, Server and Physics, Oh My!

So many people get flummoxed over the final LI of their mesh that I thought I would try to put into simple terms some things you can do to figure out how to get the best LI and that means understanding your mesh and the Second Life Upload window. This will be an amalgamation of information from various sources, so they can be accessed on one page and the information is accurate as I have understanding of it at the time of this writing in April of 2013. Once you create your mesh, whether with Mesh Studio or any other 3D program, it is time to upload it.


While working with your LODs and physics mesh is very important, once you upload, there are three things which determine the final cost and LI of your mesh:  the DOWNLOAD, PHYSICS, and SERVER calculations.  The highest of these three calculations becomes your LI.


•What is LI?

The terms land impact and land capacity replace prim count and prims parcel supports, but the numerical values remain the same for legacy objects made only of standard prims.  Therefore, a linked object composed of 42 normal prims with their physics type set to Prim has a land impact of 42.  (source)


•What is Download, Physics and Server?


For each object in the Second Life world, Second Life compares three important performance factors: download weightphysics weight, and server weight. It then chooses the highest of these weights and assigns it to the object as that object's land impact rating.
Here's a very quick overview of the different weights; for more information on each, follow the links below:
  • Download weight: Calculated by determining how much bandwidth is required to download and view the object. Larger and more visually complex objects have a higher download weight. You can reduce the download weight of complex objects by generating or uploading less complex meshes for differing levels of detail when you upload a model.
  • Physics weight: Calculated by determining the complexity of the object's physics model. You can reduce the complexity of a mesh's physics model by using the analysis and simplification tools in the Upload Model window, by uploading your own less-detailed physics model, or by choosing a different physics shape type, such as Convex Hull, on the Features tab of the Build Tools window. Vehicles must have a physics weight of 32 or lower, but may have higher download or server weights.
  • Server weight: Measures the impact an object has on Second Life's server resources. Objects that are composed of many prims and have physics enabled and/or contain scripts tend to have high server weights. (source)


•How can I offset these calculations to lower my LI?

If the high contributor is DOWNLOAD weight.  This has to do with your LODs.  

In MS, you control your LODs by using the Mesh Studio menu when generating your meshes as described in these articles:

http://meshstudiovirtual.blogspot.com/2013/02/a-beginners-workflow-guide-for-mesh.html?view=magazine

http://meshstudiovirtual.blogspot.com/2012/09/optical-optimization-options.html?view=magazine

The other way is to use physically modified copies of the prim linkset where you remove prims, or simplify forms by combining parts.  Remember that the LODs represent what you see as you cam away and you see less detail when you do that.  

Also remember, and take into consideration, that if anything you remove removes a part that was its own prim material face, at least one face on your linkset must survive that has that material on it.  (Example:  if your linkset is set up to have 4 prim material faces, then all the LOD mesh must contain the same 4 prim material faces on at least one face somewhere on the build.)

Look at your build carefully.  The larger the build will eventually be in SL, the more impact the types of prims you use will have on how quickly the LI jumps.  If the mesh uses cylindrical beams, for instance, you could change these to box beams in the lower LODs as boxes are the simplest form you can use.  Again, read the Optical Optimizations article for more insights. 

In Blender, similarly, it's a matter of simplifying the forms in your meshes:  cylinders to cylinders with fewer sides or down to square box shapes, etc.  You can take your high LOD mesh and copy it and use the "dissolve" function in the menu that appears when you press X in edit mode.  You can remove loops.  Dissolve is great since it preserves the UVs.  You want to watch your UVs as you work.

When you cam away from your mesh in SL, you want to retain the overall silhouette of your object, and lose detail as you back away.

If PHYSICS is the high contributor, you need to examine your physics mesh.  If you did not provide one, it likely used the number of triangles in your lowest LOD to make its calculation.  If that is the case, lowering that number will help resolve that issue.  If you provided the mesh, then you need to study how you made your physics mesh.  

Remember that the physics mesh is simply telling SL, "here is what I want to walk on, there is what I don't want to walk through, this is an opening through which I want to pass."  This implies that you can use planes to create the surfaces.  It has been shown that using boxes will be fine to use and not much of a contributor.  If you are dealing with very large builds, perhaps it would be wise to consider using planes with possible.  This article deals with Physics and shows how to create single planes from a box for use in Mesh Studio.

Remember to simplify your forms for phsyics.  If you have a wall with windows and a doorway, you don't need to walk through the windows, normally, you do through the doorway.  Simplify the wall as if it doesn't have windows.  If the door is round, simply to a square.  If the wall is thick enough that you think your customers will walk into them, then do a physics shape for each side without edges inbetween them.  For curved surfaces, such as a round balcony, use flat planes in the least amount that will help keep the balcony from being walked through.  Narrow faces create narrow triangles and these are not good for physics shapes and can throw errors.

This information will serve the same if you are making your meshes and physics shapes in Blender.

If SERVER is the high contributor, in Mesh Studio, this normally means you may have used the Object2Mesh script as opposed to the Object2JoinedMesh script since the server calculstion has to do with the complexity of the mesh which can be greatly affected by the number of unjoined meshes.

In Blender, joining the meshes will help you.


If I can find more info on this topic, I will update this article, but hopefully this bit will assist you in leaning out your meshes while keeping them pretty and efficient.

Happy Meshing!
~ele


A beginner's workflow guide for Mesh Studio

(updated with additional information on 04/16/13)

There are many workflows for using Mesh Studio.  People have been asking me for examples of how they should work and how to learn Mesh Studio best, so I'll try to lay out something in this article for those who are just beginning to use Mesh Studio.

When you purchase your Mesh Studio and the box arrives, rez it.

Important:  Make sure that you have done the IP Test and have payment information on record with LL.  Instructions are found here and I highly recommend that you do both Agni (the SL grid we are all on) and Aditi (the beta grid where you don't pay with your money to upload tests).  There is a separate test to take for each grid, though the test questions themselves are the same.

Touch the box and it gives you a folder with the contents.  The folder name will start with "Mesh Studio".

Rez the registration prim, "MS Account Activator".  This registers you with the server from which the Collada .dae files are generated.  These .dae files are what allow you to upload your meshes to SL or take them to another 3D application that supports Collada.

Rez the updater prim, "MS Update Checker".  This ensures that you are using the most up-to-date Mesh Studio.  Rez it out regularly to make sure if any more updates have been released.

In this workflow, we will deal only with prim linksets.  Mesh Studio allows you to use any prim with any prim cut or torture, supported by LSL scripting, to build an object.  The mesh will be as good as your linkset is made and how well your prims are aligned.

We will build a simple, but detailed table to demonstrate how to:
  • Create material faces.
  • Pre-texture your prims.  This is what creates the faces.  We will use textures from your Library folder to keep it simple.
  • Make prim faces transparent, via the Edit window, to block generation of mesh on those faces.
  • Use the Object2JoinedMesh.  This script is the more commonly used script of the two available in your Mesh Studio folder.
  • Create the High, Medium, Low LOD (level of detail) meshes and generate Collada .dae files for each.
  • Create a Physics mesh and generate the Collada .dae file for it.
  • Upload the mesh to SL.
  • Examine the mesh and apply textures.
If you are new to building with prims, please go over this article:

Create the table as follows:
  1. Create a box.  Make it 1m on X, 1.5m on Y and 0.05 on Z.

  2. Raise this prim to the height you want your table.

  3. Hollow it with the default Square hollow shape to 0.95 (the max hollow).

  4. Shift-copy this prim up and use Ctrl-Z to put it back to same position as the first box.

  5. Hollow this box changing the hollow shape to Circle.  Make the hole 0.75.  Scale X to 0.85 and set Y to 1.3.

  6. Shift-copy this prim again and Ctrl-Z to align it with the first two prims.

  7. Scale this third box to 0.97 on X, 1.4 on Y and 0.03 on Z.  We will be using these prims as our table top.  By texturing this last prim with an alpha texture, it will give a nice border and inset to the table.

  8. Use the "Waterfall-medium overly" (Waterfall folder) texture in your Library folder to texture the third prim as glass.  Use any needed repeats, rotations and/or offsets to make this top look as desired.  I used 0.3 Horiz/0.2 Vert with a horizontal offset of 0.3.  Mesh Studido will remember these repeats, rotations and offsets when you apply textures after meshing.

  9. Select the inner box with the circular hollow.

  10. Shift-copy the prim downward.  Un-hollow the prim and change the scale to 0.0150 on Z.  This makes it a bit thinner than the table top.  It will be a knick-knack or coffee-book shelf under the table top.  Lower this shelf to a low level.  We will now make the four legs.

  11. Starting at the negative Y end, when looking in edit, create a box and make it 0.09 on X and Y.  Taper it -0.2 on X and Y.  I added shear to slant the table legs in a bit on both X and Y.  Scale the leg so it will fit under the table top.
  12. Note how the axes show the positive ends with the arrow
    heads when you go into edit on an object.

  13. Place the leg so it is inside the boundary of the knick-knack shelf in one corner.  Adjust its height as you see fit.

  14. Shift copy the leg and check the shear to make sure it's slanting in the desired direction.

  15. Select both legs and shift copy the pair and move them to the opposite side of the table.  Or if you sheared them, like I did, rotate the pair 180 degrees before moving them into place.

  16. Link all the pieces together, with the outer border table top prim as the root (there's a reason for this), and name the linkset to Table Test in the Name line of the General tab in the edit window.  Remember that when you select and name a linkset, you are naming the root prim.

  17. Use the Brazilian Rosewood texture from the Wood folder in the Textures folder in your Library to texture the wood parts of your table.  (Or any suitable texture in your inventory.)  Remember to use "Edit Linked" to isolate your work on any one prim, or more, in the linkset.  Make sure to set any repeats, rotations and/or offsets needed to make it look as desired.  I used 1:1 repeats, but rotated the texture by 90 degrees.  Then selected all the legs and changed the vertical repeats to 0.5.

  18. Since we can keep Mesh Studio from generating mesh on any prim face that we make 100% transparent in the transparency field of Textures tab in the edit window, we will do this to a few faces that will not be visible in the final mesh.  Using Edit Linked, pull one set of legs on the long side of the table outward by selecting one leg and shift selecting the other.  Make the top face of each leg 100% transparent.

  19. Use Ctrl-Z to return the legs to their original position.

  20. Repeat this to the other pair of table legs and your linkset is ready.


Exploded view of the table pieces on the left, the final linkset in the middle and the final table fully textured one on the right.


We are now ready to generate out our .dae files, so go into edit on the table.

From your Inventory's Mesh Studio folder, take the Object2JoinedMesh script and place it in the contents of your linkset's root.  It is important to use the "joined mesh" script because it is what allows you to maintain the material areas you  have created by adding textures and/or tints.

The script creates hovertext which displays that we have a table made of 8 prims, with 50 prim faces; 4 of them invisible, and grouped into 2 Mesh Faces (which can also be called Material faces or Materials - the SL edit window will access them with "Select Face").

Want to learn more about the way we create "faces/materials" with Mesh Studio?
http://meshstudiovirtual.blogspot.com/search/label/Materials

Want to learn other ways to texture your prims in Mesh Studio?
http://meshstudiovirtual.blogspot.com/search/label/Texturing

  • You have now made a linkset that will be used to generate your mesh.  
  • You have named the linkset, by naming the root prim, to make it easier to identify your files.
  • You have textured it with two textures which will result in two material faces which can be textured independently from each other after the mesh is generated.
  • You have made some faces transparent so they will not generate mesh.
  • You have placed the Object2JoinedMesh script into the root prim.

Now we will make the LOD (level of detail) meshes using the MS menus.  The Mesh Uploader window has four LOD levels.  This allows us to control how the mesh breaks down at each LOD switch as you cam away from the mesh and get further from the mesh.  In real life, the further away we are from an object, the less detail we see and we mimic this in computer games.  We will also create a simple box for Physics, so you can't walk through the table.  We have named the root.  We will further append the name for each LOD mesh as follows:

  1. Go into edit on the linkset and add the word High to the name in the Object Name field.

  2. Touch the linkset to get the MS menu.  It is set to Default.  We will use this setting for our High LOD mesh.  Press the Mesh button.  


  3. A file is generated and you are notified of this in your local chat and given a ZIP link.  Download this link.


  4. Go into edit on the linkset and add the word Medium to the name in the Object Name field.


  5. Touch the linkset to get the MS menu.  Change the Resolution setting to LowPoly and then OK on the next menu.  This will change the number of faces generated to a lower count.  We will use this setting for our Medium LOD mesh.  Press the Mesh button. 
  6. Download the generated ZIP.  You can see why we are naming them to know which is which.


  7. Go into edit on the linkset and change the word Medium to the word Low in the Object Name field.


  8. Touch the linkset to get the MS menu.  Change the Resolution setting to LowLOD and then OK on the next menu   This will change the number of faces generated to an even lower count.  We will use this setting for our Low LOD mesh.  Press the Mesh button.


  9. Download the generated ZIP.

Want to learn more about optimizing your meshes?
http://meshstudiovirtual.blogspot.com/search/label/Optimizing

We will now create the Physics mesh.  SL requires us to tell it where the collision surfaces are on a mesh.  These are the surfaces we walk on, do not go through or define the area we can walk through.  A simple box will work for this table.  While complex builds may require more, the goal is to keep the physics shape as simple as possible and to be logical about it.

Want to learn more about Physics? 
http://meshstudiovirtual.blogspot.com/search/label/Physics
https://sites.google.com/site/tamaproducts/slmeshphysics


  1. An easy way to create the shape is to either make a box that fits over the table, or make a copy of the linkset (keep the original linkset intact in case you need to change it later).  In the case of this table, use Edit Linked to select the root prim and unlink it.  We chose this prim as it is the prim that has the same dimensions as the outer surface of the linkset on X and Y.  The texture will be ignored by making it physics.  Physics models have no texture or face assignments. 

  2. Now select the rest of the still-linked prims and delete them.

  3. Un-hollow the hole on the root prim and edit the prim to pull down the bottom end to the ground.  Now your prim is the same mass as your table (if your legs don't extend past your tabletop).

  4. Rename this prim to Table Test Physics.  Since it is the root prim, it also still contains the Object2JoinedMesh script.

  5. Touch the prim.  The setting should still be at LowLOD, but if it is not, touch the Resolution button and change it to LowLOD and then OK, on the next menu, and then Mesh to generate the .dae file.

  6. Download your Physics ZIP.
Original table on far left.  Root prim is unlinked in center.  Root prim is un-hollowed and  the height scaled for the bottom to reach the floor; thus matching the mass of the table.  This box now can be used for physics.


We now have four ZIPs.  Unzip each one.  By having named our linkset's root prim, prior to creating our .dae files, we are able to clearly distinguish between the LOD meshes and the Physics files.  My recommendation is to create a directory with a project name for your meshes and place all relevant files within the directory.

(Tip:  Remember to always change the root prim's name to what you want the file name to generate as; once you have several files to upload, it pays off to easily see which is which.  I can't stress this enough.)

Let's upload our table.

NOTE:  The SL Mesh Upload window will upload up to four LOD mesh files (high, medium, low, lowest) and one Physics mesh all in the same upload.  This is the recommended way to upload.  

For meshes with physics, I will still stand by my recommendation that you use the LL viewer over any other one.  I know Firestorm, and possibly other TPVs have or are getting the full Havoc license, but it's your money to upload, so why take the chance.  There are many ways to set the phsyics in the SL Mesh Uploader, but since we are providing our phsyics mesh, we can ignore the other settings other than just loading the physics mesh file in the appropriate tab (see below).

On your Inventory window in SL, you should see a plus sign and when you press that, select Upload>Model.

The "Choose a File" browser window opens from which you will choose your Table Test dae.

The Upload window opens.  The model name invariably says "o2jm1Mesh".  Change this to a better, descriptive name for you model.  Table Test, like your files, would be fine.


SL will do the lower LODs, but they may not be how you want them to break down and the results can vary for how the LI is calculated.  We have more control when we make them ourselves.  You can, however, see how SL breaks down the LODs by changing the preview to show you the high, medium, low and lowest LODs.  Use the same navigation controls as you use to rotate, scale and move the view in SL in the Preview window.

Press the Generate button on the Medium level and load in the Table Test medium file.

Press the Generate button on the Low level and load in the Table Test low file.

We have one more LOD, Lowest.  For this one, you need to experiment.  You could enter 0 (zero) in the Triangle Limit field.  This normally results in one triangle.  This is what is seen at the furthest LOD.  You may want more of the mesh to be seen.  The more of it you want seen, the higher the number of triangles, which may result in higher LI.  How much depends on the complexity of the mesh which is why you want to experiment and why I recommend the test grid, Aditi.  For this example, I changed the numbers (while watching the lowest lod level in the Preview) until just two shelves were left; that number was "9".  When I changed it to "8", it went to only one shelf, which might be acceptable to you or you may want more mesh showing at the lowest LOD.

Once the LOD levels are done, change to the Physics tab.  Under "Level of Detail", change "choose one" to "load from file".  Navigate to your Table Test physics file and load it.  The yellow piece in preview under physics, is the physics mesh.  If you upload your own physics mesh, you do not need to analyze.

Please note that recently, we have found that, especially for doorways, we have had to press the analyze button for the mesh to upload correctly.

Now just press "Calculate weights and fee".  Mine came in at 0.5.  The three calculations are important.  My download was 0.2, physics was 0.4, and server was 0.5.  The highest of the three becomes your LI (land impact).  0.5 will round up to 1 in the edit window.  However, because the table was 0.5 in reality, when I linked two copies of the tables together, the LI became 1 for the linked tables.  When I linked four of the tables, it was 2 LI.

Once the mesh was uploaded, I rezzed it and made a copy.  I used "Select face" in edit and applied the same textures I had on my prims and the mesh textured like my prim linkset and it stayed faithful to the repeats and rotations I had used.


There is, of course, a lot more to what you can do, but this should give you a thorough start.  Press the "Labels" button on the right hand side of the blog for categories for my articles for more information on what I covered in this one.

Happy Meshing!
~ele

Tuesday, January 15, 2013

Using Sculpts and Subsculpts from Sculpt Studio with MS

If you own Sculpt Studio, you may have seen that you have an object called the Mesh Dropbox in the contents of you latest update (remember: check for updates regularly by putting out a new mat).  This box allows you to register a sculpt made with Sculpt Studio to be used as a component in your Mesh Studio Builds.  How to do this is covered in my "Rethink your Sculpts for Mesh" article in this blog.

Here is some more information on what things you can do to make sure that your sculpts are going to make your mesh even more dandy but not at the expense of higher land impact (LI).


Key points to understand when using sculpts for mesh:

  • The Mesh Studio scripts will only affect the prims in your linkset if you use the menu options for lowering the resolution of the mesh surfaces made from your prims.  Sculpts will always be at their highest resolution as a result (the equivalent of Default 4/24).
  • While sculpts will still have 1024 faces, when making a sculpt, even if you only used 8 slices out of stack and turned all others to poles, the number of faces will not diminish.  However, that same sculpt, when used for generating mesh in Mesh Studio, will only use the number of any full faces as any points that are in the same location (pole slices, slices with multiple points on top of each other, or slices on top of each other) will merge.  Examples:  poles will merge to one (1) point, a 4vert square slice will merge to 4 points, three slices in the same position will merge to the number of points in only one of the slices.
  • If you put a texture on your sculpt when you link it to your linkset (or use by itself), it will retain the ability to use that texture (and any repeats, rotations or offsets if you use them) when it is mesh.  Each separate sculpt will count as a material face if you put a texture or color different than on any of your prim faces.

Using Subsculpts for Mesh

If you are not familiar with how a subsculpt is made to use in Sculpt Studio, you can learn how at this page:  http://www.sculpties.info/mediawiki/index.php?title=Plug-Ins

Basically it is using a finite subset of the slices, so for instance, you could create a gem with 8 slices out of 32.  For Sculpt Studio, that means you could use the subsculpt four times in a stack of 32 slices to make four gems (4x8=32).  However, if you use them with Mesh Studio, the slice shapes you used for the gem may be octagons.  This means the slice points will whittle down to 8 points each since any points on top of each other merge.  The poles will merge as well.  So your subsculpt may be nice and low poly which is very good for use as mesh.

You can use these subsculpts for Mesh Studio by registering the map for the subsculpt from the directions in the aforementioned article.  Now you can just use these subsculpts to build with and they contribute far less potential mesh than a full sculpt.

What if you've made a sculpt that uses most of its points?  How do you then make this far less of an LI-exploder?

In the same way that I have shown, in other articles, that we can create the lower LOD meshes by lowering the number of faces in the LOD mesh by simplifying the prims we use for the model (see "Optical Optimization Options"), we can do similarly to sculpts.  Create simpler versions of your sculpt by recreating it with fewer points.  How?

If the model has slices that had 32 points, revise the slice shapes by doubling up the points so they will merge.  Do the same with the slices.  Sure it takes more time and thought to do this, but if you're LI-conscious, then it's a no-brainer that you just need to buckle down and do it.

Here's a trick that sometimes works depending on the complexity of your slice shapes.  You have a sculpt that is 32 slices with 32 points each.  Make the sculpt and then make it into a subsculpt.  Use the sculpt with a 64 slice stack once and make the second set of 32 slices into poles and copy them to the position of the the 32nd slice (which is slice 31).  Now you have a new sculpt that is still 32 slices, but only 16 points on each slice.  You can still try doubling some of those remaining slices, too.  Always preview your sculpt to see if the silhouette is adequate for your needs; remember, you're looking for it to look enough like your sculpt with less detail for when you're further away from your mesh.  You can even try it a second time with a 128 slice stack in the same manner.

It's a matter of some planning and ingenuity, but it can pay off in the ability to use shapes only achievable with sculpts and lower LI to show for your effort.

Happy Meshing!
~ele
The Big Stuff: Architecture in Mesh Studio

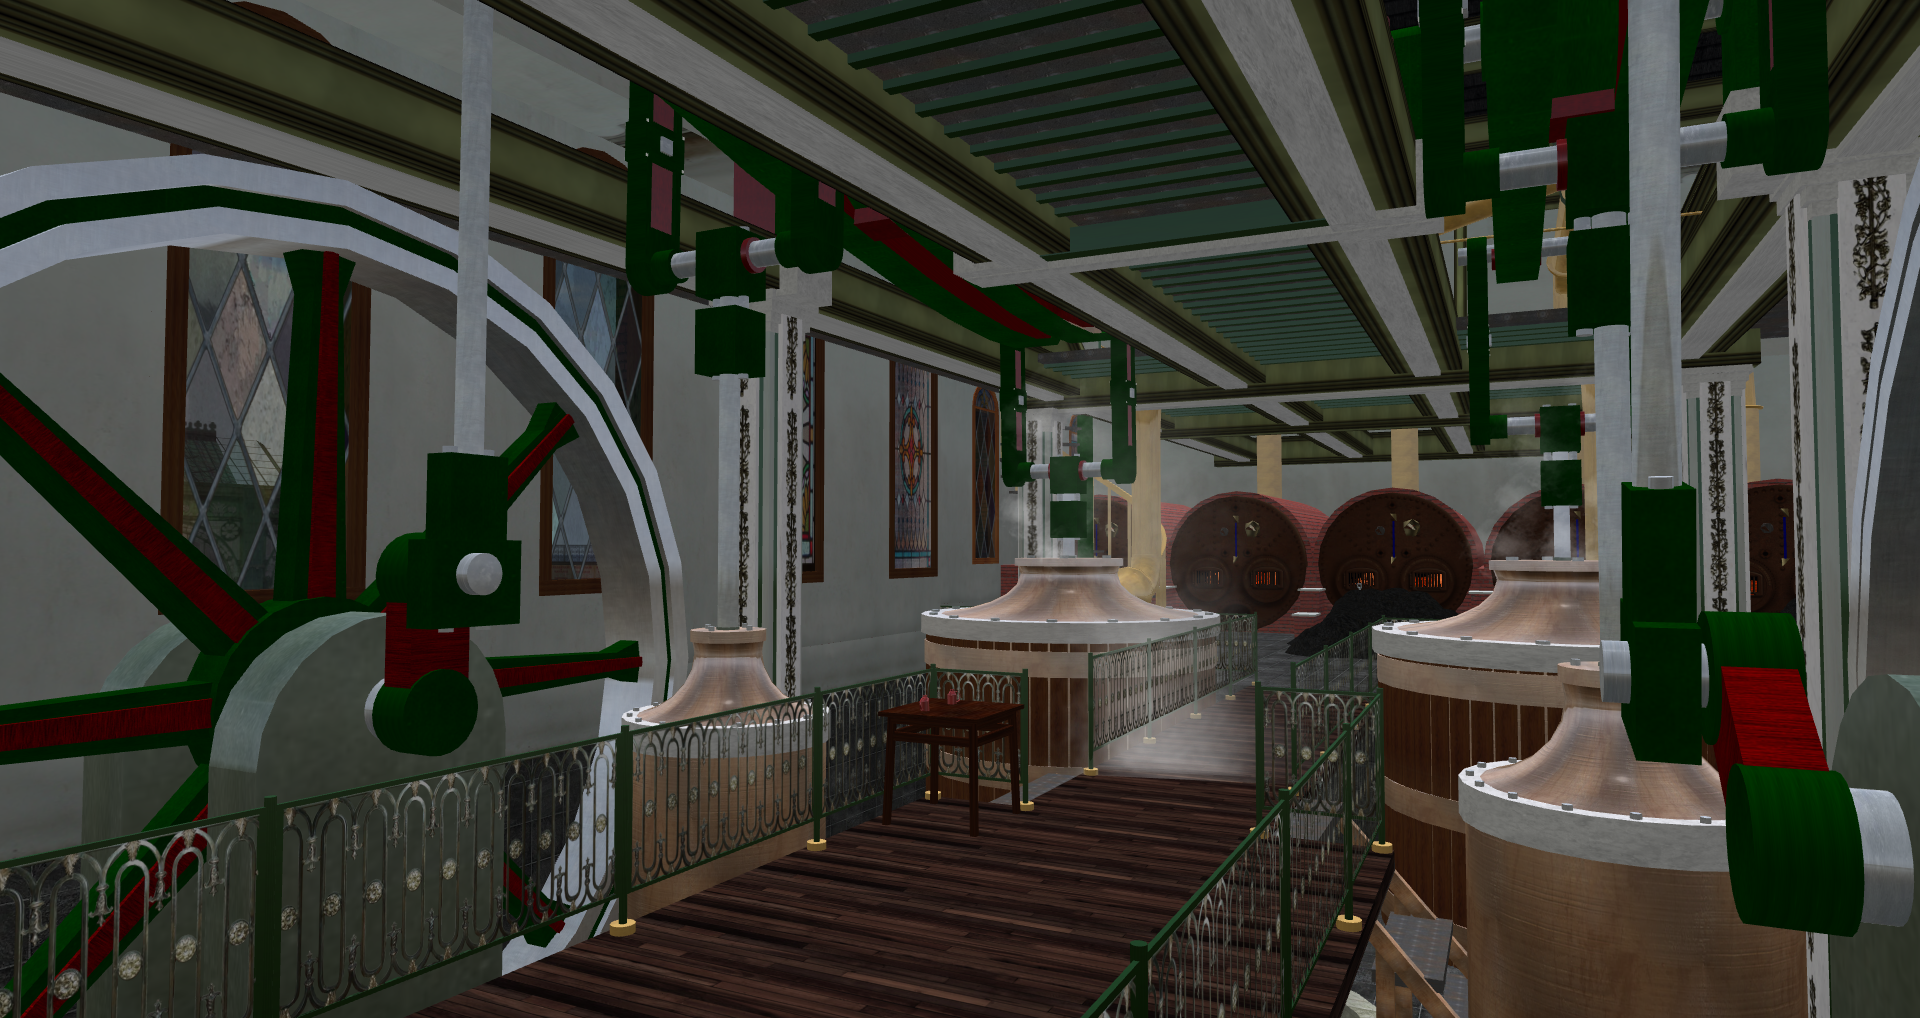
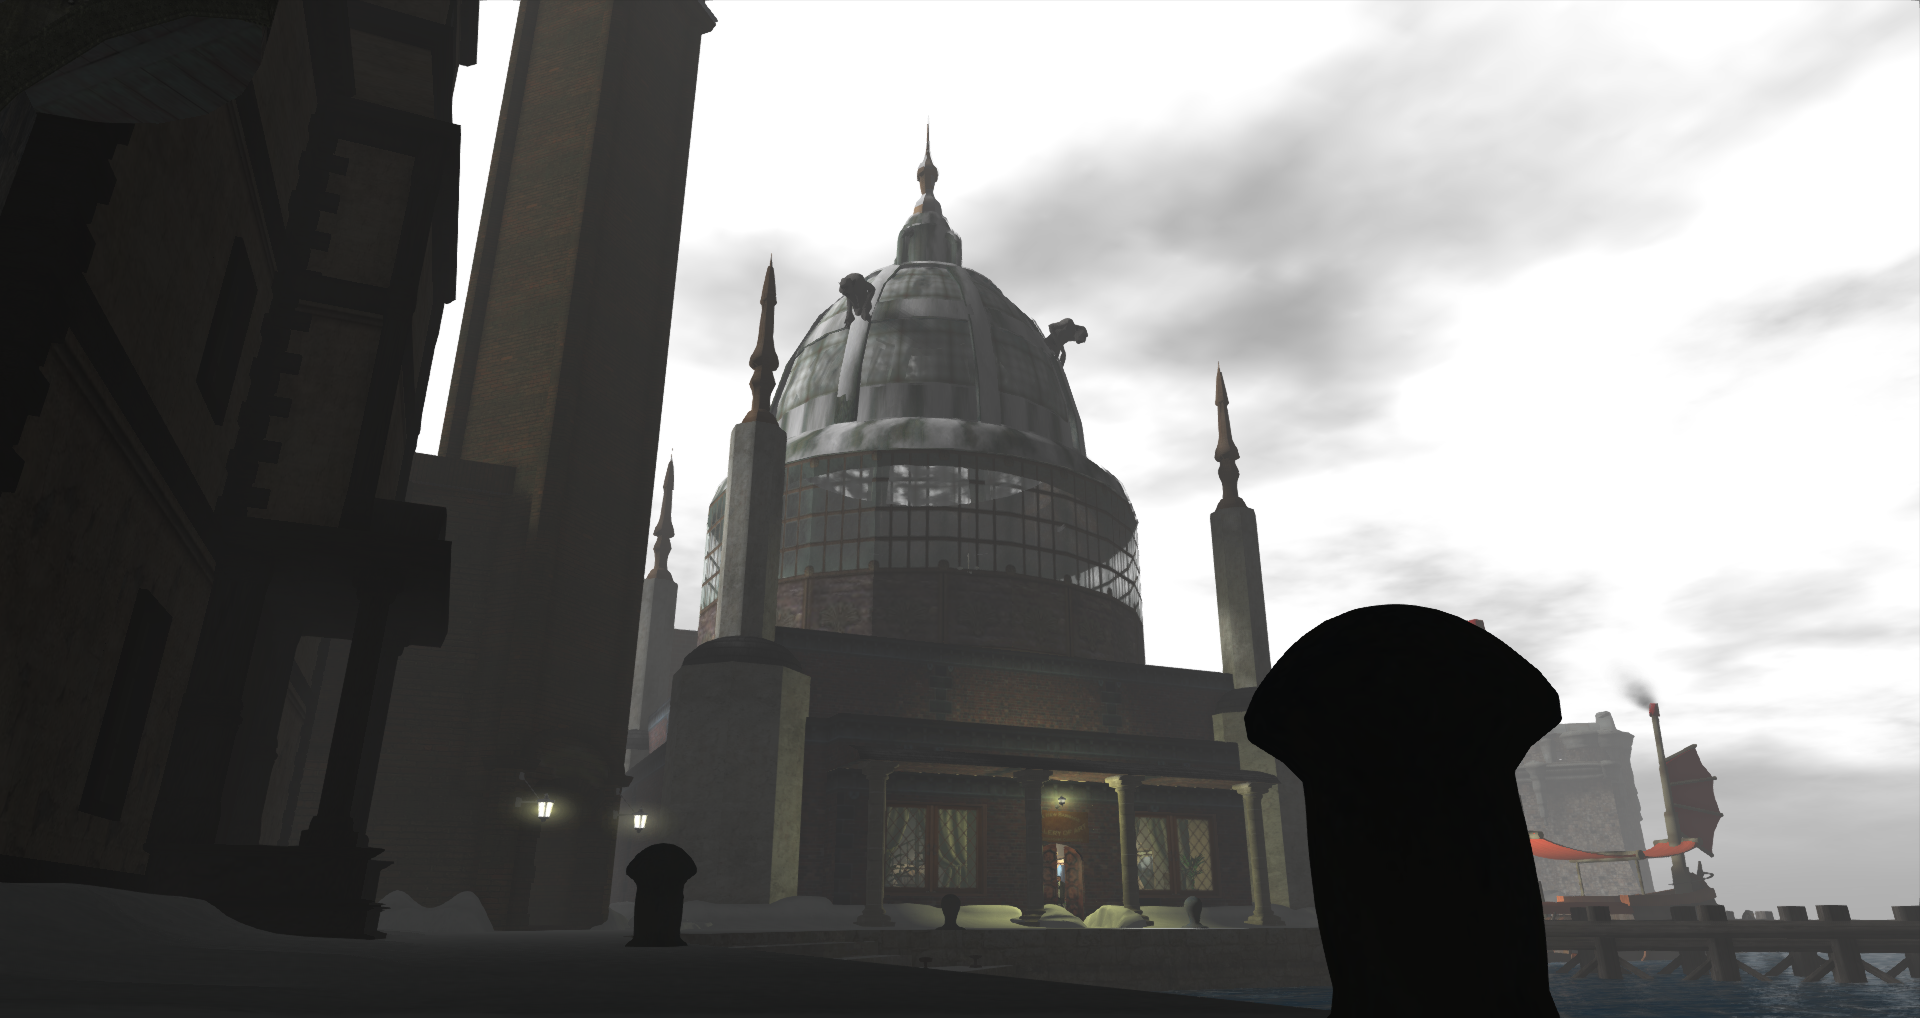
Architecture is a topic of interest to many in Second Life.  We've all seen our share of wonderful destinations where residents have recreated real life global points of interest as well as spun sims out of their imaginations.  When making these large structures, there are always considerations about how to make them and keep the land impact (LI) at a manageable level for mesh.  Mesh Studio is a wonderful way to build architecture.  We have a Mesh Studio Flickr group (Founded by Jo Yardley, please feel free to join and show off what you have done in Mesh Studio as well.) and two of its prominent contributors both do architecture.

I thought it would be great to showcase both Jo Yardley and Victor1st Mornington and hear how Mesh Studio is part of their workflow.  I hope you find their work as inspirational as do I.


Victor1st Mornington


What is the focus for the type of architectural style you have chosen to do in SL?  Did your own interest spur you to do what you're creating or did someone come to you with the idea or job?

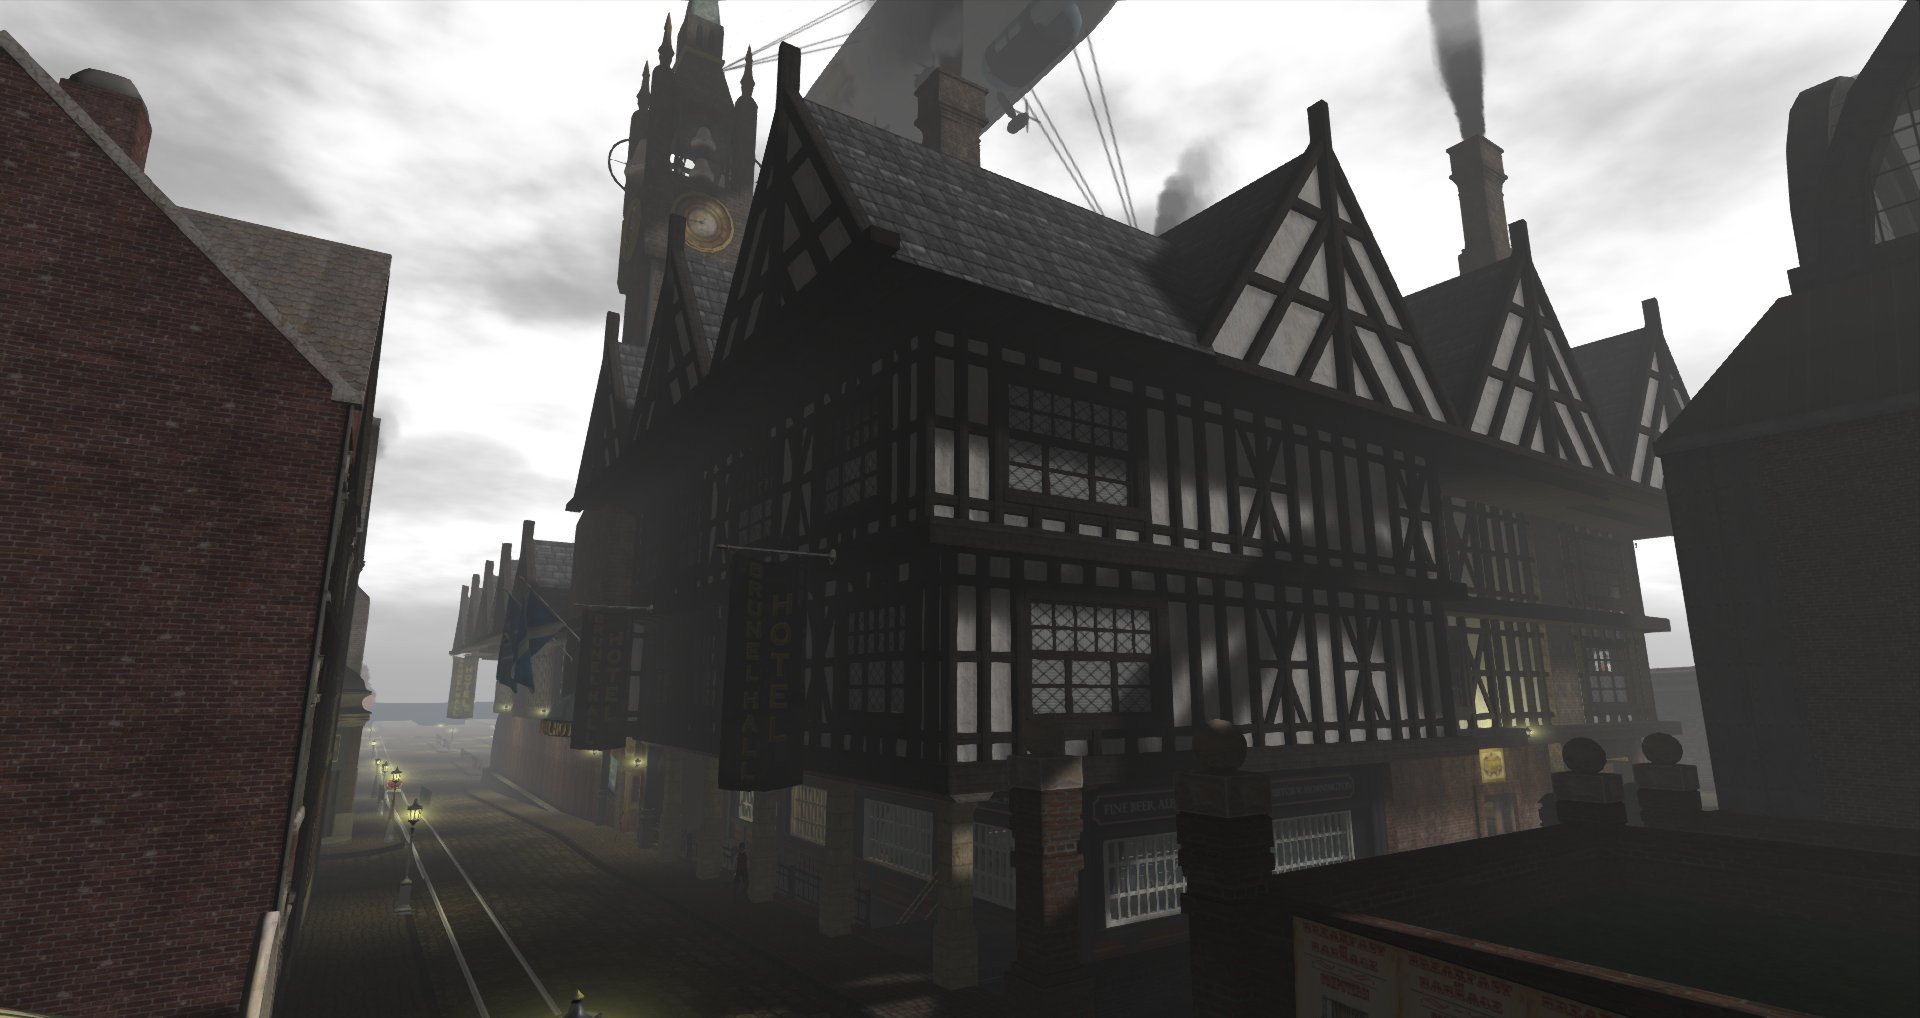
The bulk of my builds, for at least the mesh side of things, is done in New Babbage or related to the distinct Steampunk Victorian era style which goes with the era and setting the nine regions of New Babbage is set in.  The biggest building I have made with Mesh Studio is Brunel Hall, a "Mock Tudor" style of building which is commonly referred to as "Tudorbethan".  Other buildings I have made in New Babbage are based on the same Victorian era styling.

I started building originally for the Doctor Who community, add on expansion rooms for TARDIS consoles, even some TARDIS exteriors.  I bought a plot of land in the City State of New Babbage in 2009 because I was told about the steamlands by another Doctor Who fan in Second Life.  New Babbage has a reputation is being a city full of fine builders.  The main region has been in the Destination Guide for.. well.. a LONG time, almost every major social event in New Babbage somehow gets listed in the Destination Guide as well and there have been countless Machinimatographers, Photographers and bloggers who have filmed, pictured or told stories about the city.  My build style has started leaning heavilly towards the Victorian era due to spending 4 years in New Babbage :)

I rarely build anything for the Dr Who community nowadays.  That community has a large pool of Blender, Cinema 4D and 3DS Max users.  New Babbage as well is now seeing a rise in the amount of folks who are using desktop modeling programs but there is also a lot of Mesh Studio users in New Babbage.


What are you finding as the biggest challenges to working with large structures where we know that mesh LI can loom large when objects are scaled up?  What kind of things do you do to keep the LI from getting out of hand?

Simple.. don't scale up the mesh build.. build it in prims to scale, that way you wont need to size it up.  Brunel Hall is roughly 90m from the bathing hall wall to the pub wall, 50m from the front wall to the back wall and 50m from the bar cellar floor to the peak of the roof.  The entire structure of the building, inside and out was made with Mesh Studio from the pre-existing prim build that was already there.  I had no need to scale it up which meant i got true LI counts when the mesh item was rezzed inworld.  The only time you should scale a mesh build is to scale it DOWN...try to avoid scaling UP!

 As for keeping the LI low...

 Large buildings, say 20m and up, you can get away with using 2/24 for the resolution.  If your building has no curves and all flat lines, use the Low Poly (but not Low Lod) setting.  If your building does have curves in it, lets say for a drain pipe going down the outside, or arch top door frames and windows, then use 2/24.  It is always better to use the default 24 setting for curves because the lower that resolution setting for a curve below the default the worse it will look close up.


Also, think about your building.  Do you REALLY need all those curves in it?  A square top mantle door frame and a square top and bottom bay window looks just as good as an arch and costs you far, far less in LI in the mesh model itself.  Also, one thing to remember... make those hidden faces 100% transparent!  All those transparent hidden faces all add up to making your LI count as low as it possibly can be!  Physics is the second one, but i'll go into that on the next question :)


Physics is an oft misunderstood part of working with mesh.  Have you had any adventures, or misadventures, with this?

Physics with Mesh Studio needn't be a nightmare.  The only misadventure I've had was the physics mesh not "matching" the actual mesh model, so I would be floating above a floor by a meter or so, but i figured out what was causing that.  The one thing to remember with physics when working with mesh studio is one single question...what prims faces will avatars be bumping into to walk on, or to keep them out of the building?

If you keep that question in your head whilst modifying your prim build for the mesh model, then your physics model will come out perfect!


Why Mesh Studio?  How did you hear about it?  How has it helped you with your projects?

I tried using Blender...its UI is a mess, i tired using 3DS Max, it was too confusing.  The 'Mayor' of New Babbage (who is the owner of the regions) Mosseveno Tenk told me about Mesh Studio and what it could do, essentially taking an existing prim build and converting it to mesh, and I was hooked.  

As for how it has helped, well...

The original prim build of Brunel Hall was just under 900LI for the entire building, and that was even using the convex hull trick on flat linked walls.  The Mesh Studio version?  Under 500LI  It saved me a LOAD of prims on the land the hall is sitting on, enough to add more higher detailed stuff on the inside and expand the furnishing on the inside of the building to bring it more inline with what a classic 'Mock Tudor' mansion would have looked like.


What would you tell others about working with Mesh Studio?  What would you tell others that you wish you had known about Mesh Studio when you first began using it?

I would say two things to them.  Take your time on the prim build check EVERYTHING on it, and secondly, take extra time on the physics build!  Time spent on making sure the base prim build is all fine is less time spent having to constantly upload mesh model after mesh model (which costs a lot) because you found one texture face out of alignment >.<

As for folks who are thinking about buying Mesh Studio?  Buy it.  In the long run it will save you prims on your land, those extra prims can be used to extend your home out, add more furniture and basically make your home or shop a more enjoyable place to be in.


Where, in Second Life, can your work be seen?

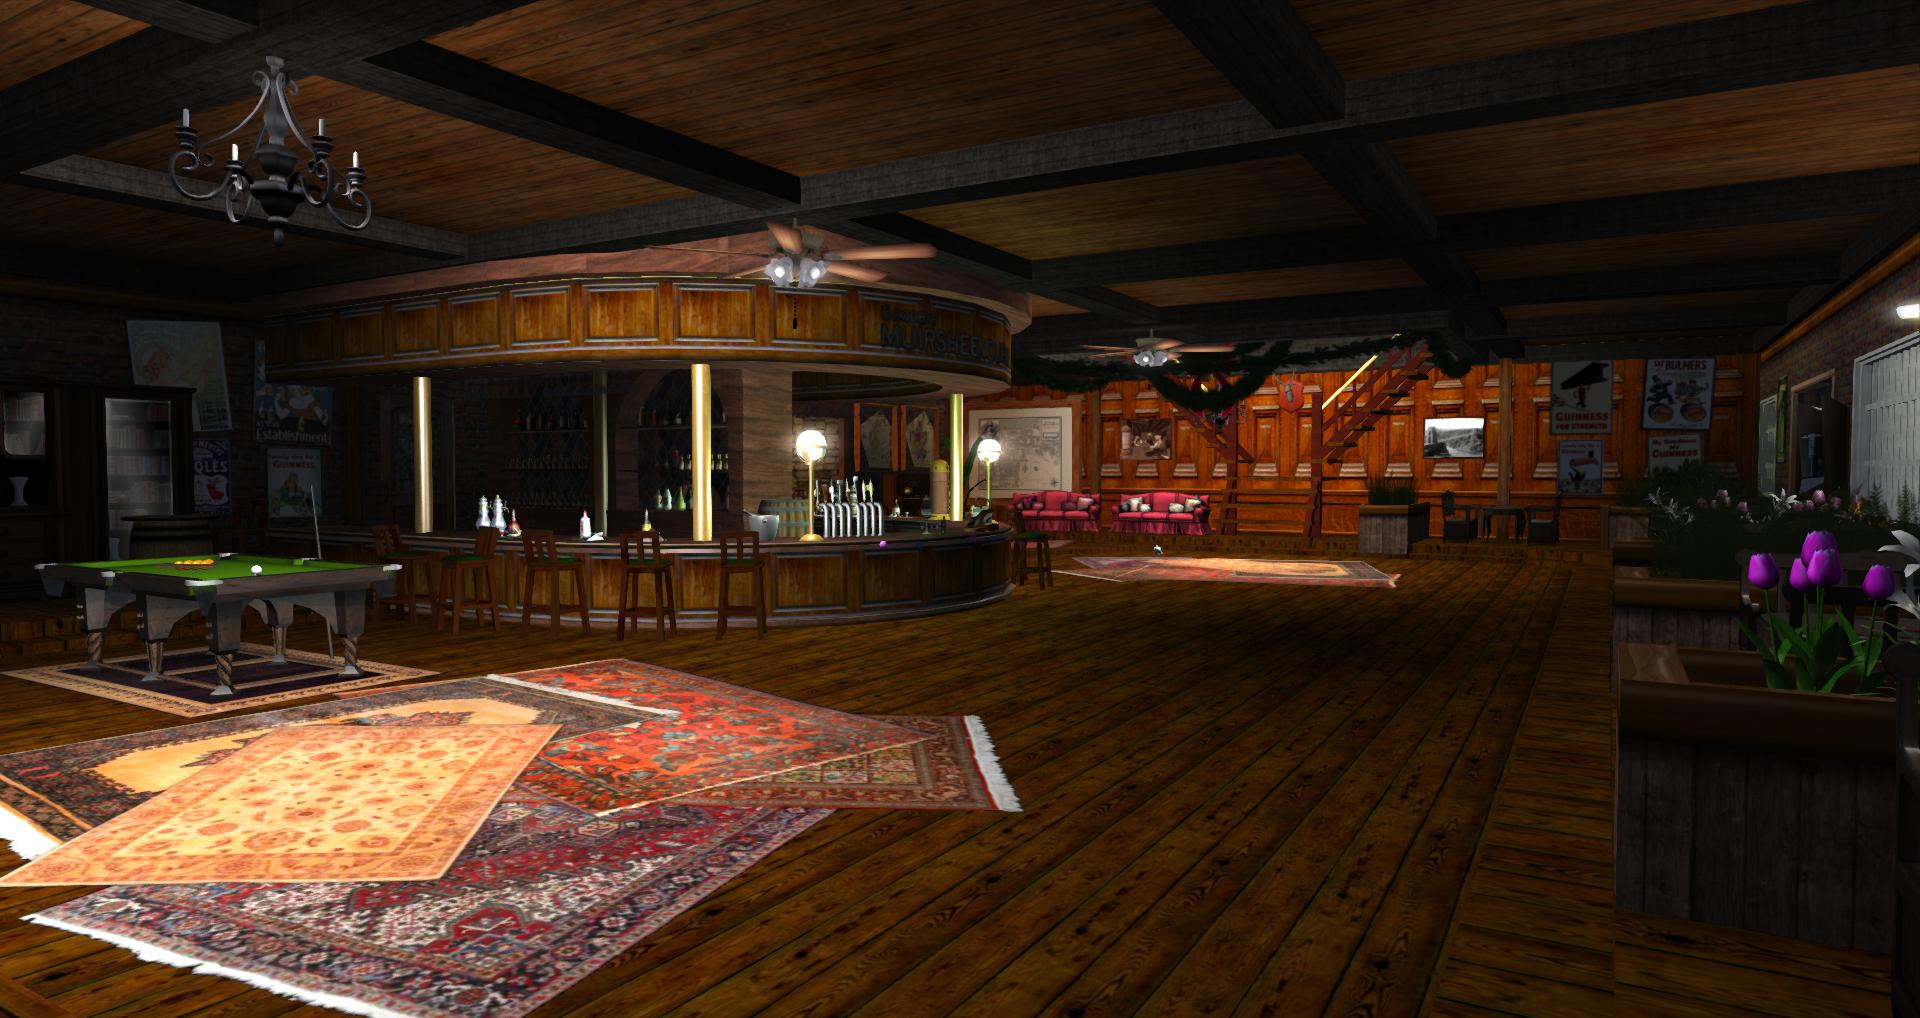
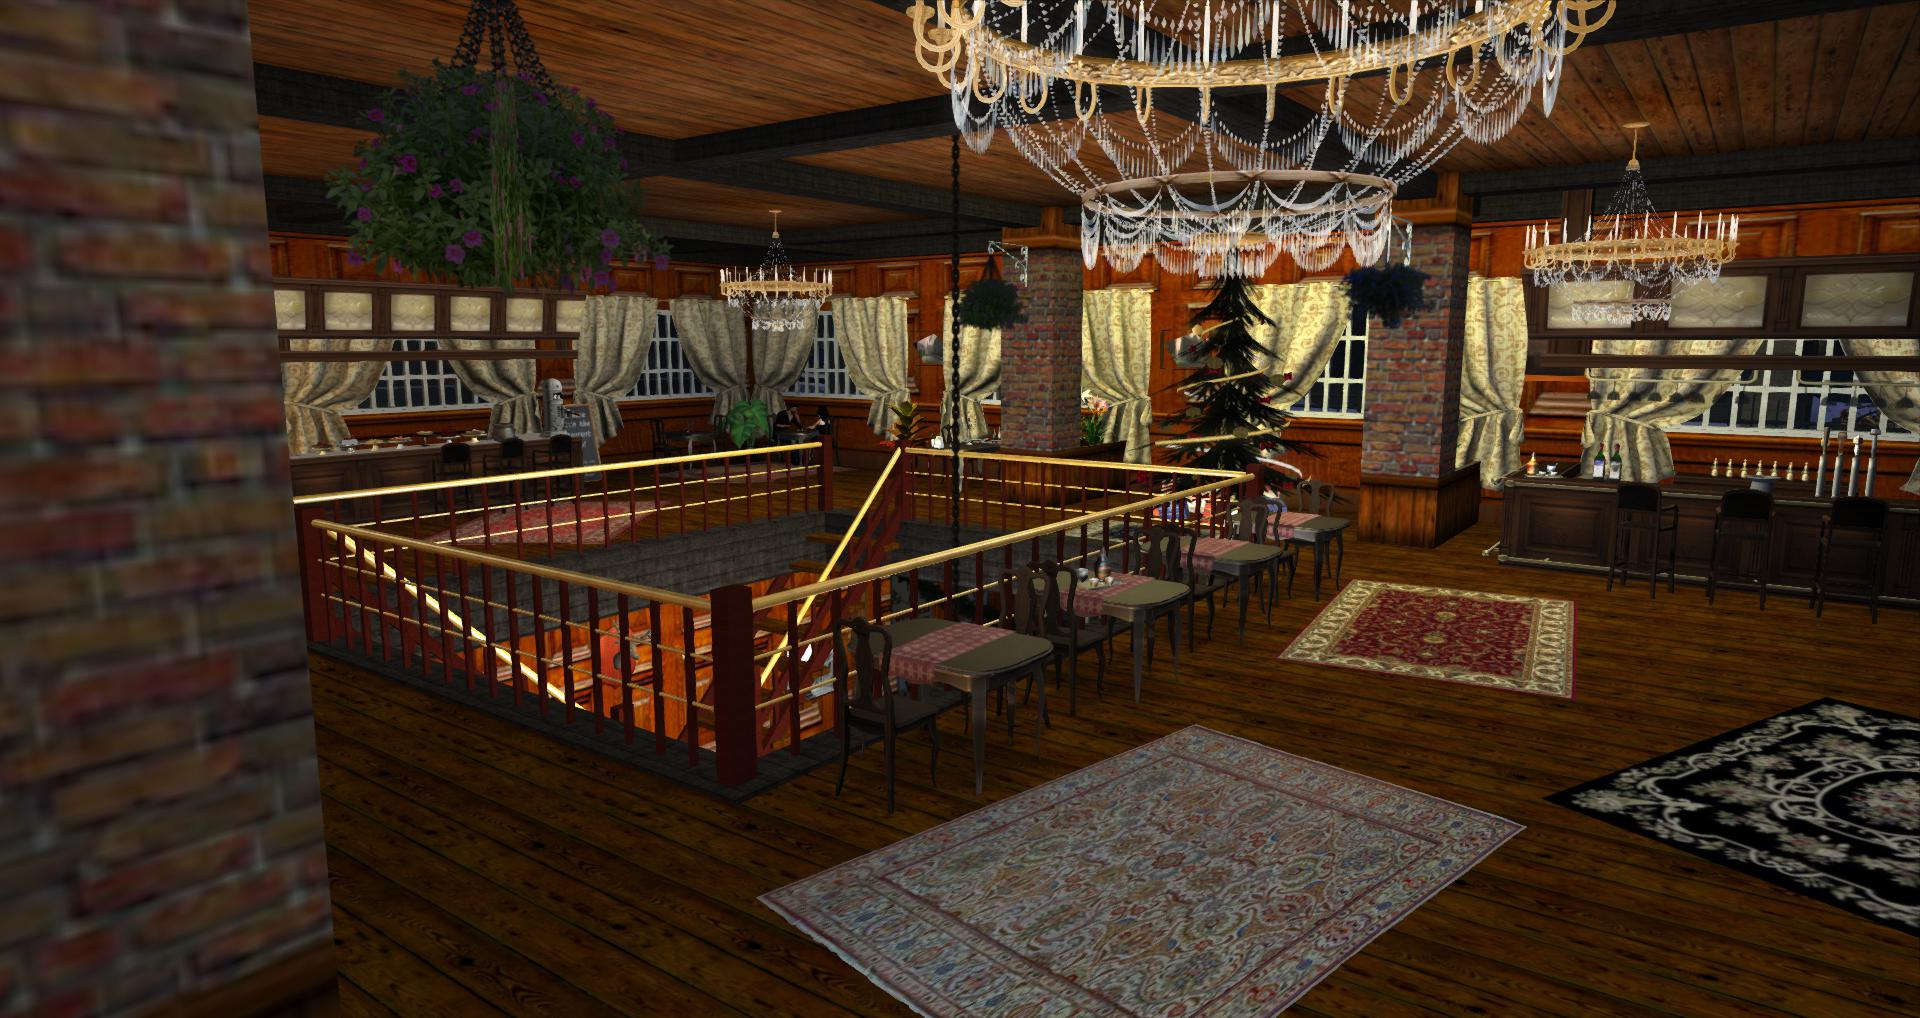
Brunel Hall Hotel & Muirsheen Durkin Restaurant (entire building done in mesh studio) - http://maps.secondlife.com/secondlife/Academy%20of%20Industry/64/86/108
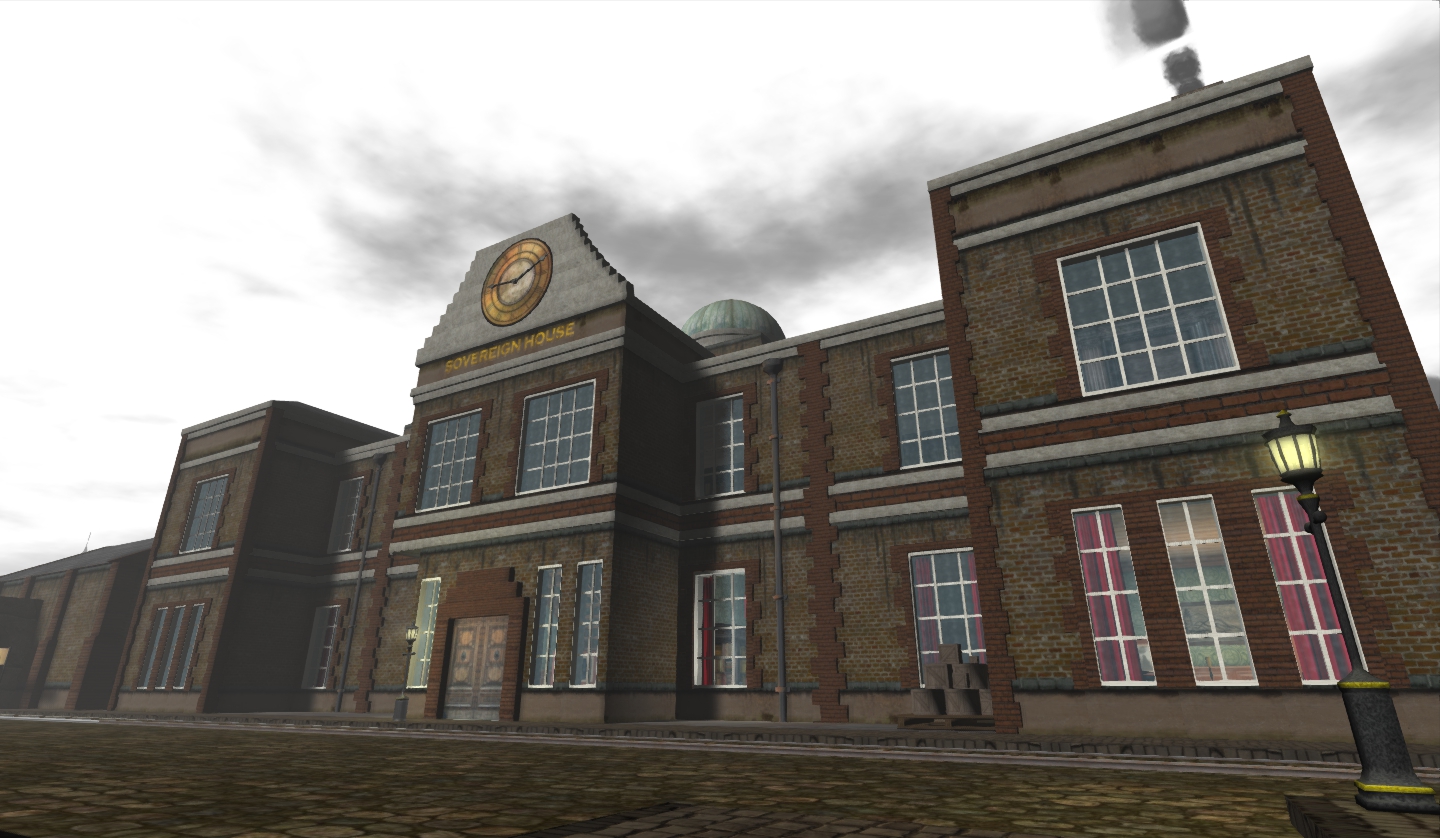
Sovereign House (entire building done in mesh studio) - http://maps.secondlife.com/secondlife/Academy%20of%20Industry/196/69/111
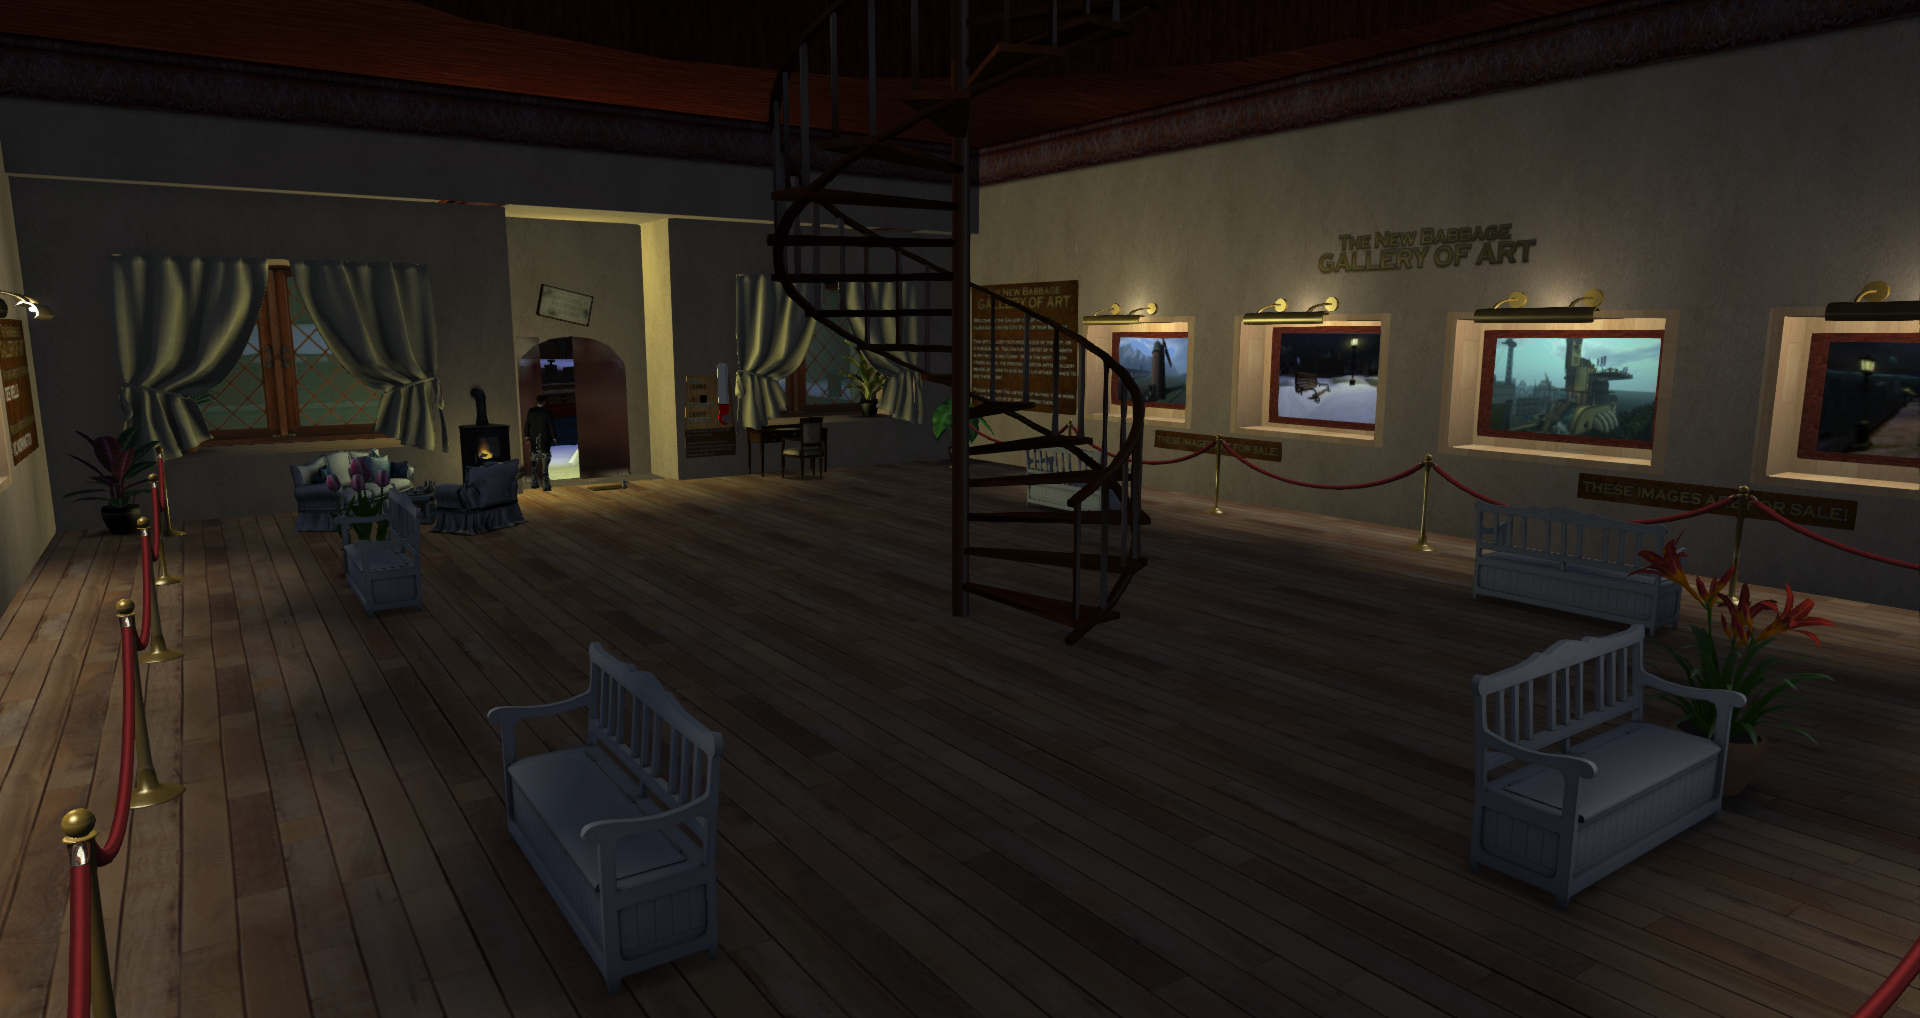
Fullarton House & The New Babbage Art Gallery (lower half and internals done in mesh studio) - http://maps.secondlife.com/secondlife/Clockhaven/128/132/103
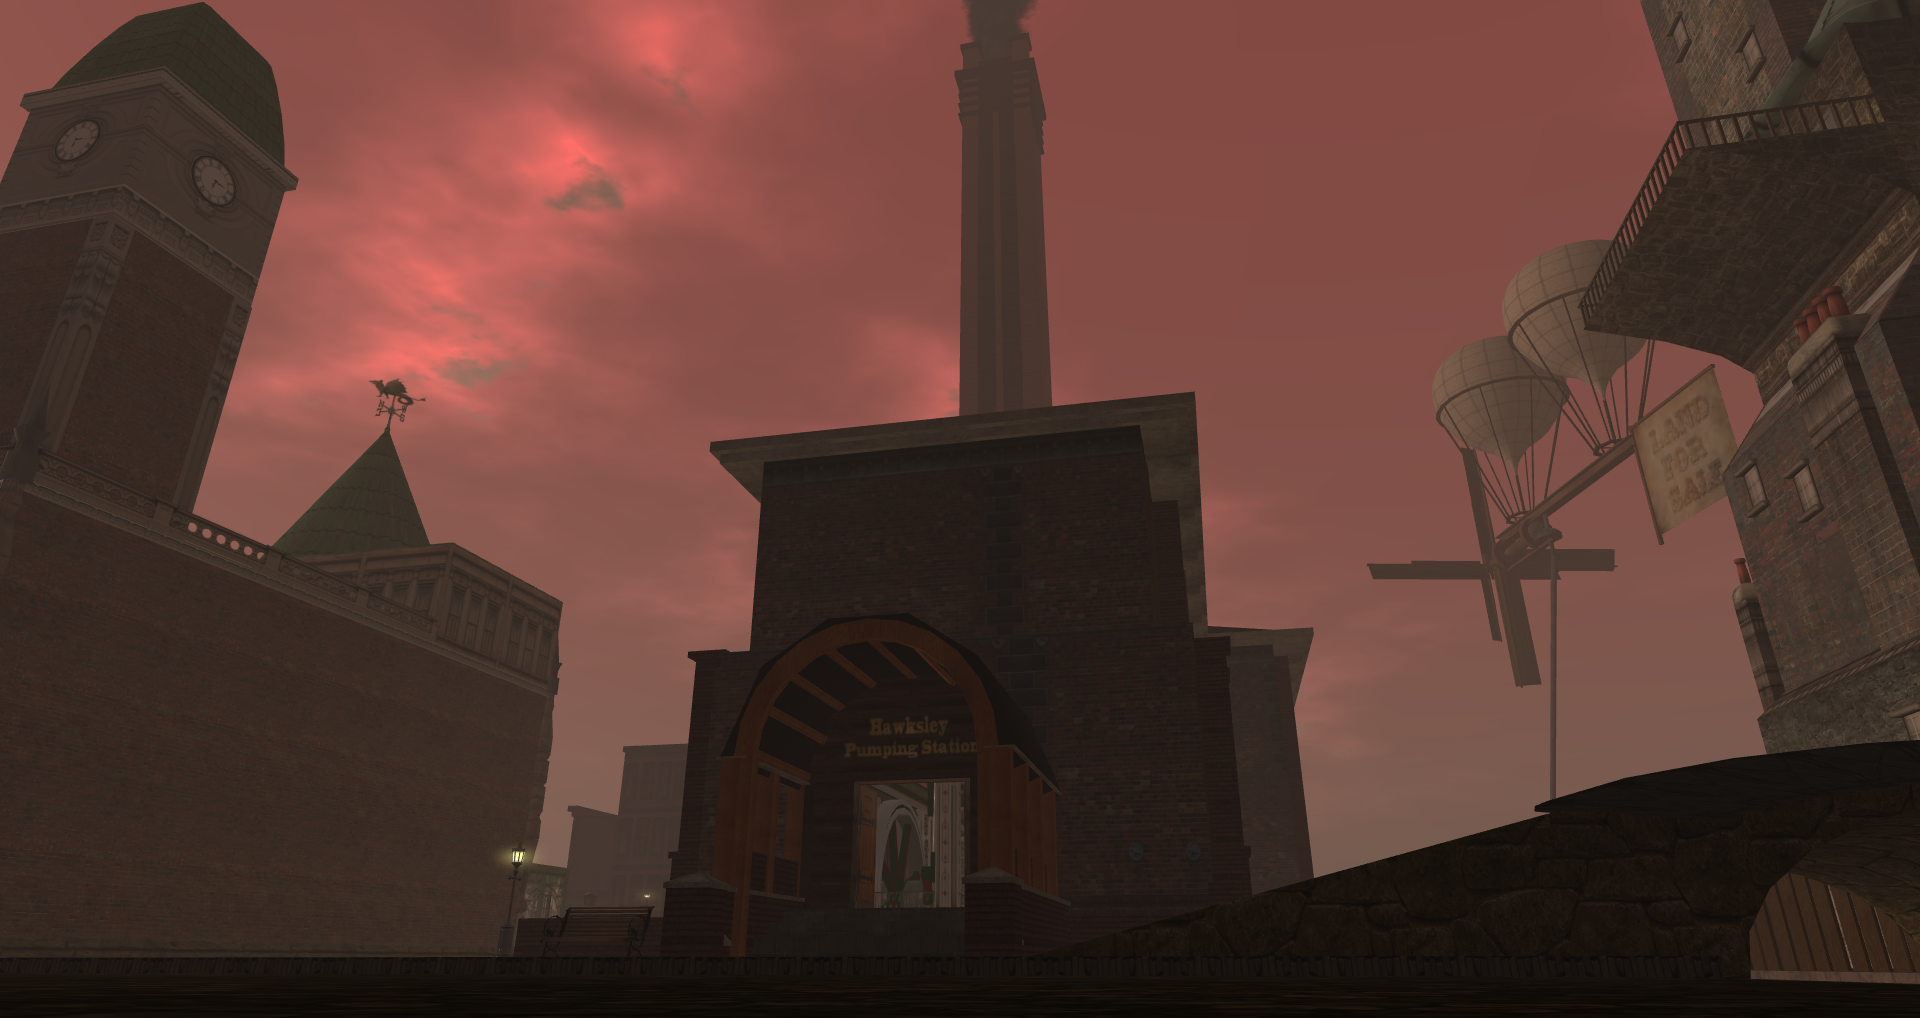
Hawksley Water Pumping Station (entire building and working twin beam engines done in mesh studio) - http://maps.secondlife.com/secondlife/New%20Babbage/177/71/103
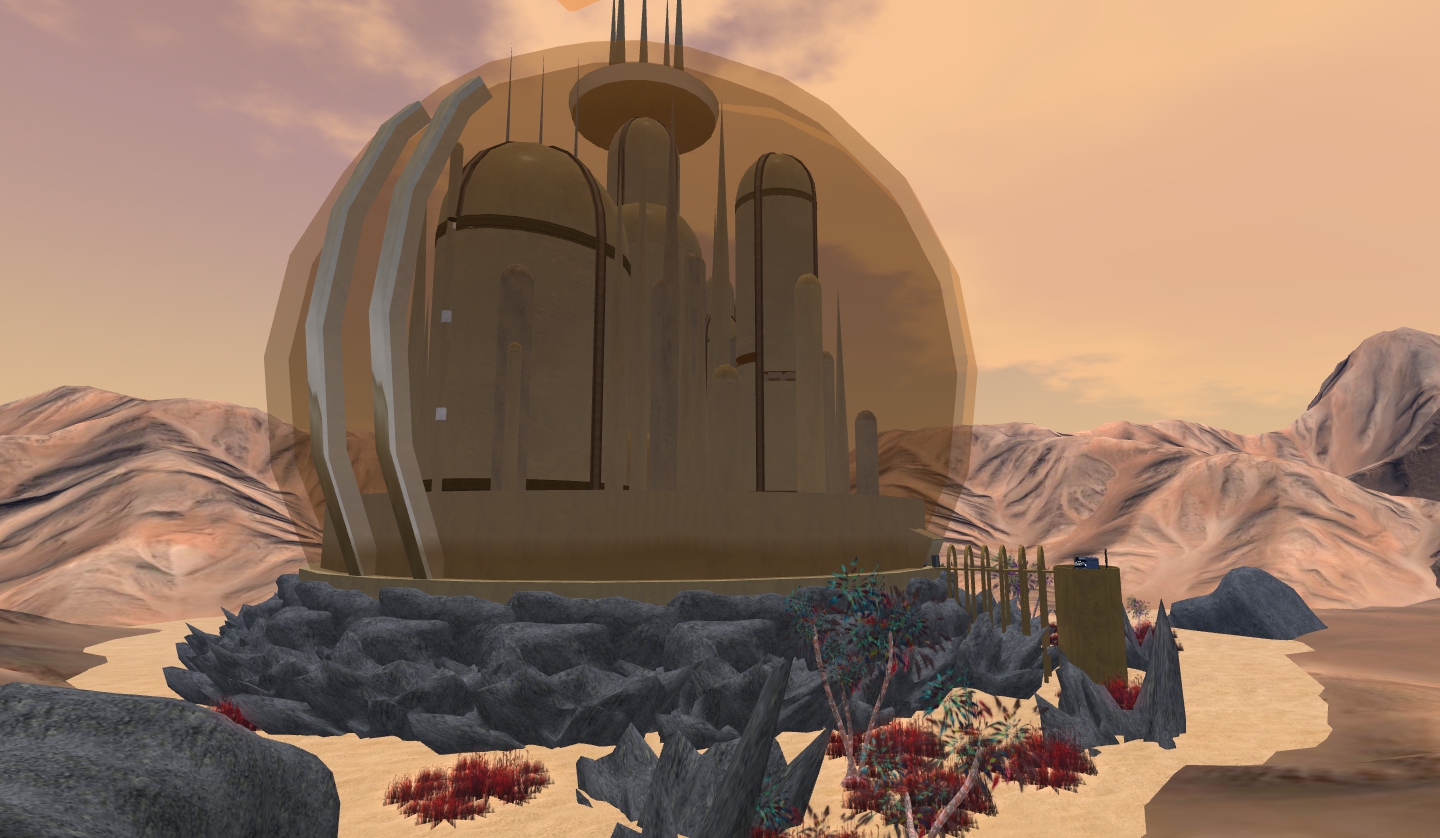
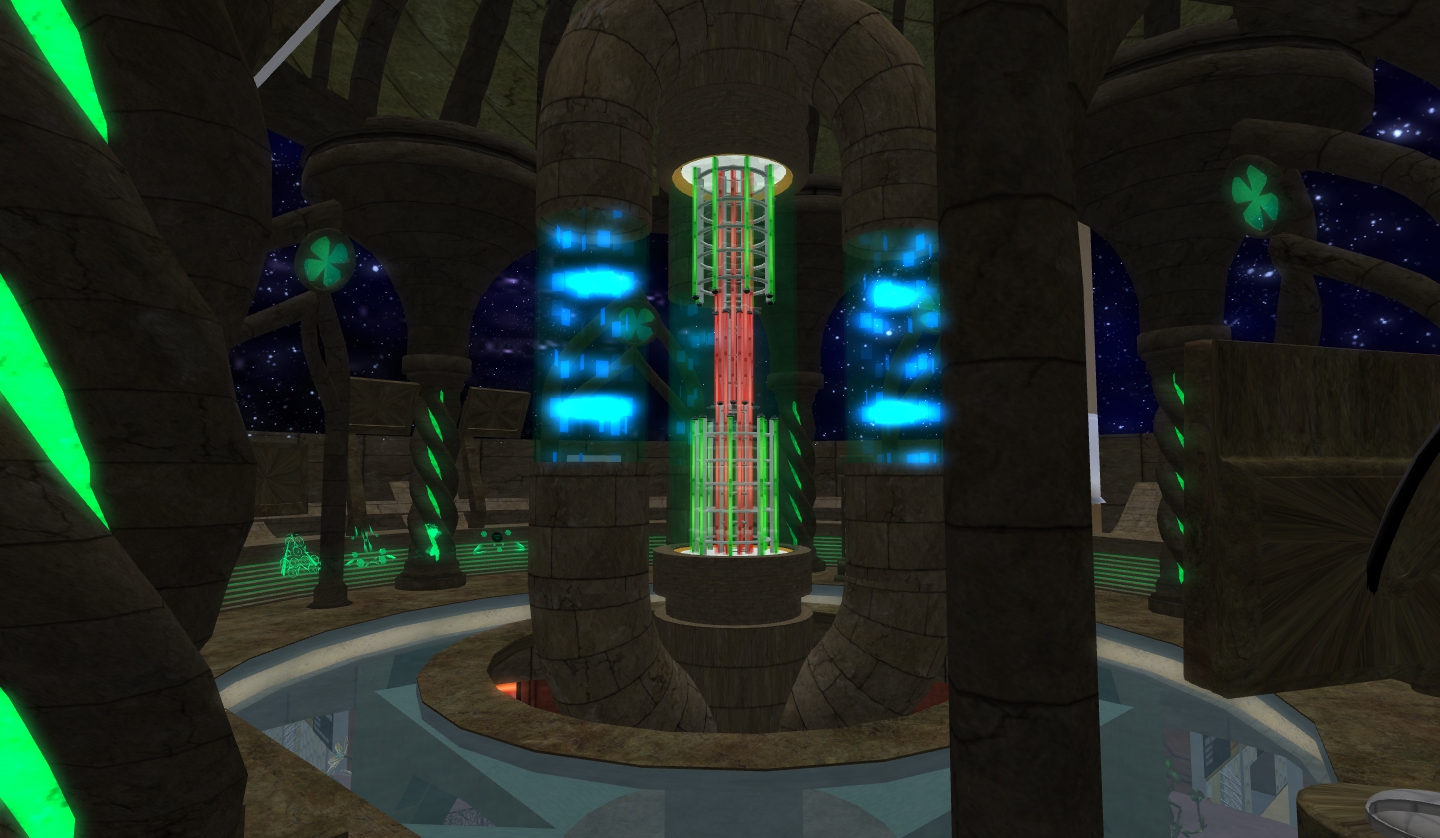
Citadel of the Timelords (internals in the process of being converted with mesh studio) - http://maps.secondlife.com/secondlife/Eutopia/246/127/3034

Also... the well known white oval RFL donation kiosks now have a 1 prim mesh counterpart, yup, you guessed it...made with Mesh Studio by me and sent to the Relay for Life of Second Life leads for upload to use for the 2013 RFL season.


Jo Yardley


What is the focus for the type of architectural style you have chosen to do in SL?  Did your own interest spur you to do what you're creating or did someone come to you with the idea or job?


I've always loved old architecture and hated modern architecture, my only interest outside of SL is trying to stop the destruction of old buildings.

But being able to build allows me to recreate the past and that is why it means so much to me in SL.

Building something that is gone, bringing it back, that is magic.


What are you finding as the biggest challenges to working with large structures where we know that mesh LI can loom large when objects are scaled up?  What kind of things do you do to keep the LI from getting out of hand?


My only focus is realism and authenticity.

Recreating the past and giving visitors an as realistic as possible experience of traveling back in time is what I am going for.

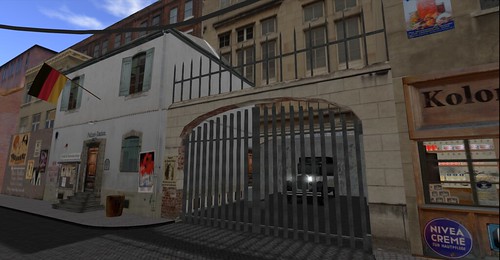
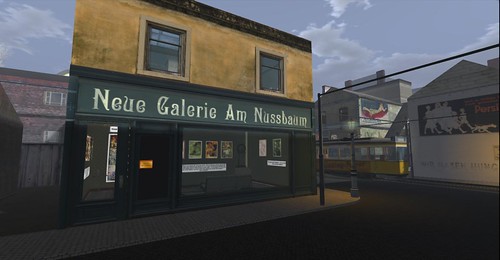
I got the idea for the 1920s Berlin Project after realising there was a Nostalgic scene in Second Life and simply started sticking prims together, I was only a few weeks in SL and had no experience at all.

So another reason I build how I build is connected to how much experience I've got, after more then 3 years in SL, I am still learning new things.


Physics is an oft misunderstood part of working with mesh.  Have you had any adventures, or misadventures, with this?


I try to make as many sides invisible as possible but I've also decided to make all my floors regular prim.

It was hard to get the collision to work perfectly on floors, somehow I always kept floating a little above the floor or my feet disappeared into it.

By keeping the floors prim, I also save on the textures I can use for the mesh.
But I also build in a RL scale, 1 meter = 1 meter, that means that my buildings in general are a lot smaller then other SL buildings.


Why Mesh Studio?  How did you hear about it?  How has it helped you with your projects?


Yes lots, just recently I made a door and just forgot about the physics, so it turned out phantom...

But it is worth doing it right, it keeps the LI nice and low.

It still can be tricky to get right.


What would you tell others about working with Mesh Studio?  What would you tell others that you wish you had known about Mesh Studio when you first began using it?


I tried some of the mesh software but soon realised that it was just much too demanding for me, at least at that time I did not have the patience or time to figure out how it all worked.

Someone mentioned Mesh Studio to me after I had been complaining about how tricky the software was.

It was exactly what I was looking for, it made Mesh easy for me.

And it motivated me to completely rebuild my sim and I am now turning everything to mesh.
I've already turned quite a few buildings to mesh.

If I had not found Mesh Studio I'd still be trying to build a simple table with mesh software.


It is easy!
Well not very easy, but a LOT easier (and cheaper) then the software I know.

And if you know how to build in SL, you can make mesh with Mesh Studio.


Where, in Second Life, can your work be seen?

Tuesday, November 13, 2012

The shape of things to come: it's a resolution thing


So you want to know what the heck all those resolution buttons are and do.  It depends on the prim shapes you use, first.

For this article, I'll use the box (or cube), cylinder, sphere and torus.


I linked these and added the Object2JoinedMesh script.

First I do Default resolution which is 4/24.


For each of these examples, I created a .dae and imported the .dae to Blender so you could more easily see the mesh and how it looks in 3D.


In Blender, you will see that the mesh is triangulated and this is the way it comes into Second Life.  However, it makes it very difficult to select loops (rows of faces, verts, edges), so we use the Alt-J command (all verts selected on the object(s) in edit mode, and this creates quads wherever possible.  It's just much easier to work with quads for many reasons.

So below is that these four prims look like in Blender (after quadded).

Time for a 3D term:  UV

While our objects are three-dimensional, XYZ, the UVs for meshes get laid out in a two-dimensional format and these are, in turn used as a template that guides us when we texture.  A UV map; a map of the coordinates of the 3D object in a flat 2D way.

When looking at a UV map, you will see rows going across and up/down.  Now mind you, the UVs can end up being rotated and such, but we basically refer to rows going across the UV space as "U" and going up and down vertically as "V"(as demonstrated by the yellow and grey bars on the the box in the image above).

At Default Resolution, 4/24

  • Boxes (known as cubes in some 3D programs) have 12 faces on a U row and 12 on the V rows.  There are four sides around and four sides up and around.  Each side of the cube shows 3 faces on each row U or V.
  • The Cylinder has 24 faces going around in U.  There are three going up in V, if the cap ends are visible, they also have 24 faces.
  • The Sphere has 24 faces going around in U, but only 12 going up in V.
  • The Torus has 24 faces going around in U  and going around in the other direction in V.


At Low Poly Resolution, 2/16
  • Boxes/cubes have 4 faces on U and on V.
  • Cylinders have 16 faces U and 3 on V (the 2 cap ends, if visible, only have 8 faces)
  • Spheres have 16 faces U and 8 V.
  • Torus prims end up with 16 faces U and V.


At Low LOD Resolution, 2/8
  • Boxes/cubes still have four faces on U/V.  This is the minimum number a box can have when all sides are left opaque to generate mesh.
  • Cylinders have 8 faces on U with only one row vertical on V and if the cap ends are visible, they have only four faces.
  • Spheres have 8 faces on U and 4 faces going vertically on V.
  • The torus has 8 faces on U/V.
So we've covered the main resolution buttons, now how about all those plus and minus functions for Straight and Circle.

Straight pertains to prims based on the box.  So box, prism, pyramid and tetrahedron.  Adding or subtracting straight will ignore prims based on circles.


In the following example, the prims were set up with Default.  I then press Straight+1 five times.  In default, if you recall, the U/V rows had 12 faces; 3 faces, in the row, on each side of the box.  I wanted to end up with 32 which meant I needed 5 more faces on each side (4x8=32).

Only the box was affected here; the rest of the prims are based on circles and ignored.
NOTE: Notice that the rows on the cylinder increased in V. This is because this is considered a straight side. It just didn't increase around the circle in U.

Here, below, I added Circle+1 eight times to get 32 faces on the mesh.  Again, notice on the cylinder that this time the increase occured on the U rows where they are defined by the circle.  The straight side remain untouched.  (Mind you, these examples was only for illustration; I wouldn't go above default settings myself.)


Now let's look at how subtracting from the circle changes these prims.  I wanted a pentagon, five sided cylinder, for a table in a lower LOD level mesh I was making.  Using Low Poly resolution makes the cylinder eight sided, so I applied Circle-1 three times to make it five and it worked as expected.  Different prims can have other effects.


So what uses do you have for these.  As mentioned, the most obvious is for lowering the triangle count on your LOD levels.  This is why even using just the Default, LowPoly, and LowLOD buttons will work for your high, medium and low LOD levels in the Uploader.  Now, armed with how the rest of the buttons work, you can experiment and get lower if you need to.

Always check your results in Blender, another 3D program or Aditi, the beta grid.

Knowledge is power.  More power to ya!

Happy Meshing!
~ele
Sunday, November 4, 2012

Points of Inspiration: Ashira Legien


CREATED BY ASHIRA LEGIEN

You may or may not have seen or heard of Ashira Legien.  I assure you, however, once you see her jewelry, you'll agree she's unforgettable.   A long time user of Sculpt Studio, she started right in to Mesh Studio and now uses her sculpts (through the SS 2MS dropbox) in her Mesh Studio creations with great flare and creativity.  Here is a short interview before we take a look at her jewelry, true gems of Second Life.

1.  How long have you been in Second Life?

  • Six years this December.


2.  Did you start out to be a merchant?

  • Yes .. my dream was to own my own private island.  It took me 6 months to learn to build and script and get a store going to where I could afford one.  I've owned Isle of Mists for over 5 years now.


3.  What kind of products do you make?

  • Jewelry mostly .. but also tree houses .. fun vehicles .. and a unique sculpted blanket that covers you like a real blanket and changes with each pose.


4.  Is your interest in jewerly based on what you do or would like to do in real life?

  • No.  I took the Master Jeweler class mostly because the owner said I wasn't a good enough builder to take it :-)   The beauty of SL is that you can make things here without expensive supplies or tools.  I couldn't afford the materials to make jewelry like this in RL.


5.  How did you first get started with Sculpt Studio and Mesh Studio?

  • I got Sculpt Studio when it first came out v1.0 (boy you don't know how good you guys have it with v6.1 lol)  I let TheBlack Box use pictures of some of my creations as examples to get Sculpt Studio going.  Mesh Studio was just a natural extension.


6.  How much of your work is done with one or both of these tools?

  • ALL of the sculpted and mesh items I create are made with Sculpt Studio and Mesh Studio.


7.  What pieces would you say have been your most favorite that you made with Mesh Studio?  Are they for sale and where can they be found?

  • My current favorite is the Phoenix Necklace set.  It took me about two weeks and 700 sculpted pieces to make the mesh necklace and earrings.  


8.  What would you like people to know about your work with Mesh Studio?

  • Mesh Studio allows me to create jewelry with highly detailed sculpted prims and condense them down to a few mesh pieces with less land impact and more detail than the same pieces made with just sculpts.  Mesh objects are also easier to script for color change and rez faster than sculpted prims.


9.  Where would you like to see Mesh Studio go in terms of what you would like it to do?

  • For jewelry Mesh Studio seems to work fine just the way it is.


Ashira has been making beautiful things in Second Life for some years now.  She was an early adopter of Sculpt Studio and is now working with Mesh Studio as well to make her wonderful jewerly and other creations.

Ashira uses sculpts she has made in Sculpt Studio and then transforms them with the SS 2 MS dropbox so that she can use them with Mesh Studio.

These are some of her marvelous creations:


You can see them in her online Marketplace store, https://marketplace.secondlife.com/stores/7297 and inworld, http://slurl.com/secondlife/Isle%20of%20Mists/84/123/45.

Hope you find's Ashira's work as inspirational as I do.

Happy Meshing!
~ele